How do you patch an air mattress leak? This is one of the most searched-for terms on Google by airbed owners.
Only a few things can be more frustrating than your air mattress developing a leak while you are out camping. If this happens at home, then you could easily look for an alternative bedding solution.
However, if you are on the road and you realize that your airbed is leaking air abnormally, then you will have little choice but to get it fixed. This is why knowing how to get the deed done is vital even before it happens.
After all, nothing can be more uncomfortable than sleeping on a flat bed. Why do you think there’s a whole market for inflatable mattresses that never lose air right now?
Get An Air Mattress Repair Kit
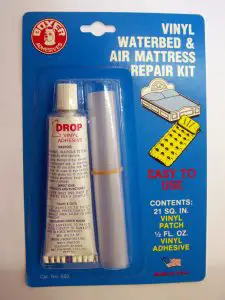
Even if you are experienced in fixing leaking air mattresses, you will still need tools to work when the unexpected happens. An air mattress repair kit is one of the most important tools you should take while on the go.
These patch kits can be key to getting a sound sleep, whether camping or fishing overnight.
They usually contain materials for testing and repairing leaks so your airbed can hold enough inflated air.
Standard components include sandpaper, glue, and patches.
The good news is that some air mattresses already ship with repair kits at no extra charge.
Even if your model doesn’t include a repair kit, spending a few bucks to get a repair kit will be money well spent when you experience an emergency on the road.
Identifying the Leak from the Mattress Itself
The most surefire way to test for a leak is to inflate your airbed to full firmness. If you notice after a couple of minutes that your mattress has lost a significant amount of air, then chances are you leak.
Sitting on your mattress after full inflation is another way to test for leaks. The spot you are sitting in shouldn’t sink more than 2 inches. If it does, there is a huge possibility of a leak.
What if you don’t have the time to sit on your airbed for a long period? A great way is to pile some weight on your inflatable mattress.
It doesn’t have to be anything cumbersome. A couple of hardcover books should do the trick.
Just leave the books on the air mattress overnight and check on it in the morning. A significant loss of air at that point will confirm a leak.
Remember that the only way you can test for a leaking mattress is to get it fully inflated. Finding a leak in a flat air mattress is next to impossible.
Finding A Leak Using the Valve
The valve holding the air can also be tested when you suspect that your inflatable mattress may be leaky. Holding your hand over the valve to look for any escaping air is a tried and tested method.
What if you don’t know which part of your airbed is the valve? Well, this is the plug-like component located right next to the pump of your mattress.
A broken or leaky valve is one of the main causes of air loss in inflatable mattresses. The bad news is that this component is usually hard to fix at home.
The solution is to order a replacement from your manufacturer or a retail giant such as Amazon.
Raising the Mattress on Its side to Test for Leaks
This method is only viable when testing for air leaks from the comfort of your home. The quirking bird chips and other background noises in campsites make it unrealistic to use this method outdoors.
It simply involves raising your airbed in a noiseless room to test for leaks. Make sure the airbed is fully inflated before you start doing this.
Side-flipping your mattress to search for leaks can be an effective way. This is because most leaks occur on the bottom side of your inflatable mattress.
This method also allows you to look for leaks with your ears. With your ears close enough to the bottom areas of your mattress, you should hear hissing sounds if there are any leaks.
What if there are no sounds even though you suspect a leak? Get your hands wet and start moving it all over the mattress. Any leaking air quickly blows over your wet hand to cool it within a few seconds.
Searching for Bubble Using Soapy Water
No one said finding leaks in your air mattress is an easy task. If none of the above methods yield results, it is time to get creative.
Soapy water is one of the most effective ways to uncover leaks in your air mattress. However, it would be best if you were warned that some manufacturers strongly advise against this method.
You create a thin layer of bubbles like a toddler, and any leaks “blow” into the bubbles. The method is as follows:
- Add one or two teaspoons of dishwashing soap to a bucket of water.
- Wipe down the surface of your mattress at a very slow pace with a sponge.
- You can start from the most likely leakage spots, such as the valves and bottom areas, before moving elsewhere.
- When you spot bubbles forming in any area, this confirms the source of your leaks.
- Make sure you use a clean sponge to remove the soap and air dry your mattress to prevent mildew.
Circling the Leaking Spot with a Pen
Finding the previously identified leakage spot after your mattress is deflated will be a fool’s errand. To identify the place, you should circle that area with a pen or another object.
Once the leakage has been marked, deflate the air mattress and make sure it is completely dry. Then you can begin the repair process.
The Repair Process
Sanding away any soft felt at the leakage source is the first step in air mattress repair. If the leakage is at the top side of your mattress, fixing it can become a bit complicated.
The best way will be to remove the softcover so your patching can stick. The felt coating can be removed with a wire brush or sand paper to get a plastic area around the leak.
Clean the leakage area with isopropyl alcohol or even soapy water to ensure no debris, dirt, or clutter. You can continue once the area is completely dry.
Cutting and Applying A Patch

It would help if you cut a patch twice the size of the leakage area. This is to ensure that you get enough room to cover the source of the leak to ensure a lasting effect.
If your patches are pre-cut, choose one roughly twice the size of the leak.
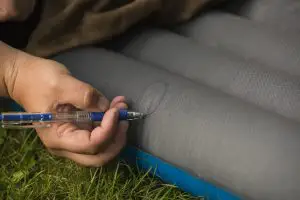
The next thing is to apply the patch according to the instructions that came with it. Some patches require glue, while others are manufactured sticky, so apply it to the affected area.
Apply pressure on the patch for at least 30 seconds. The pressure should be even, and this can be done with the heel of your hands.
Leave the glue to dry completely for approximately 3 hours before re-inflating to test for additional leaks.
If there are none, then you are good to go. Your leaking airbed is now repaired!
You can start enjoying sleeping on it again.
The Bottom Line
The steps outlined above are the quickest ways to identify and patch an air mattress that has suffered a leak.
Follow them, and you’ll never have to sleep on a deflated unit in the wilderness many miles away from home.